If you are passionate about Excel, you have certainly noticed that your mouse cursor changes shape as you move it around the program. But have you ever thought about why? It's not by chance! Each pointer has a precise meaning and allows you to interact with the spreadsheet faster, more accurately, and more efficiently. In this article, I will guide you through discovering the “secret language” of Excel pointers, helping you understand when and how to use them best to improve your productivity.
Table of contents
Why do pointers change shape in Excel?
When working with Excel, the mouse pointer is never random. Its shape changes based on where you position yourself and the actions you can perform at that moment. This system helps you understand instantly what can be done in that position: select cells, resize columns or rows, copy or move content, and much more.
Knowing these pointers is the key to mastering the Excel interface and working more smoothly and quickly. Let's look at the main types of pointers and their functions.
The main Excel pointers and their meaning
1. The white cross pointer
The white cross pointer is probably the most familiar to Excel users. It appears when you hover over the worksheet, specifically over the cells. Its main function is to select single or multiple cells.
To select a single cell, simply click on it. To select a range of cells, however, click and hold the left mouse button while dragging the pointer over the desired cells.
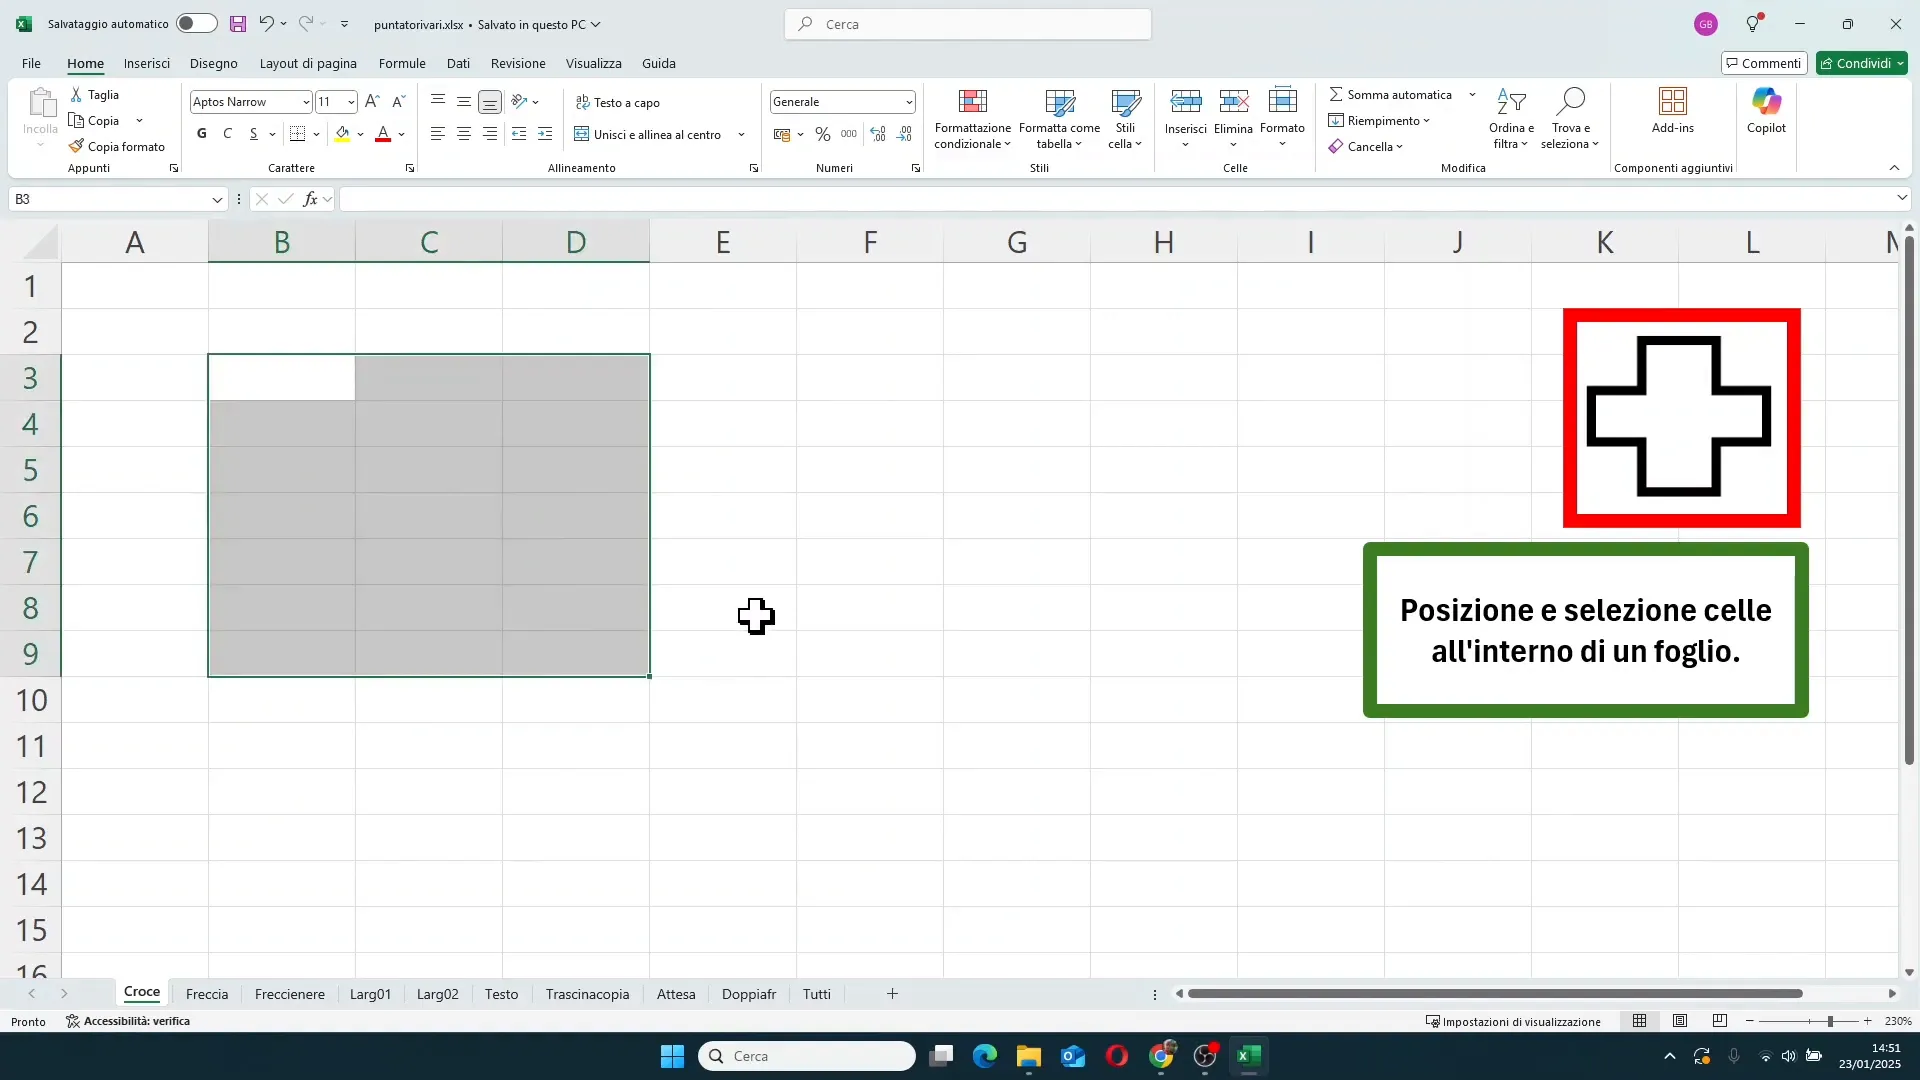
This pointer does not appear outside the worksheet, so you won't see it in the ribbon or other areas of Excel.
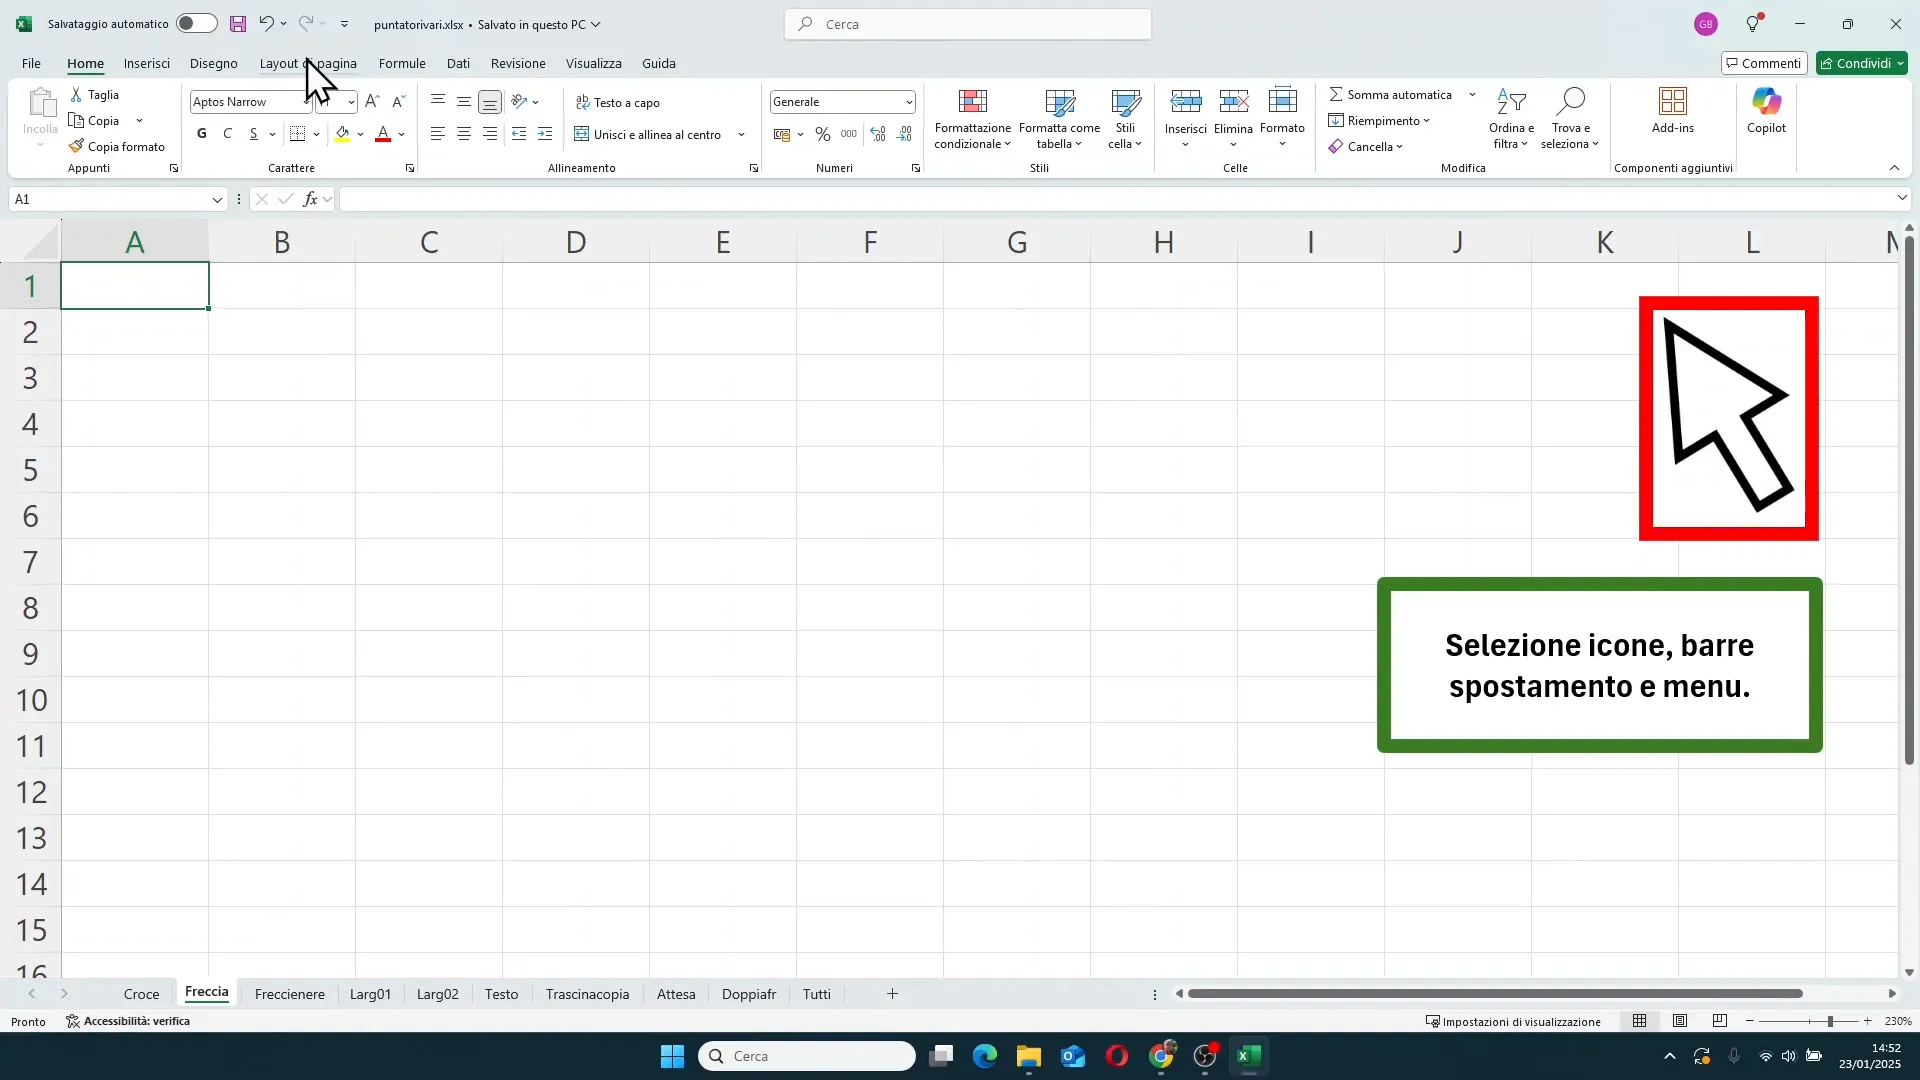
2. The white arrow pointer
The white arrow pointer is what we see when we move to the Excel ribbons, i.e., the bar with menus and command buttons at the top. This pointer allows us to interact with the various commands, click buttons, and navigate through options.
Additionally, it also appears in the side and bottom scroll bars, and in selecting worksheet tab names.
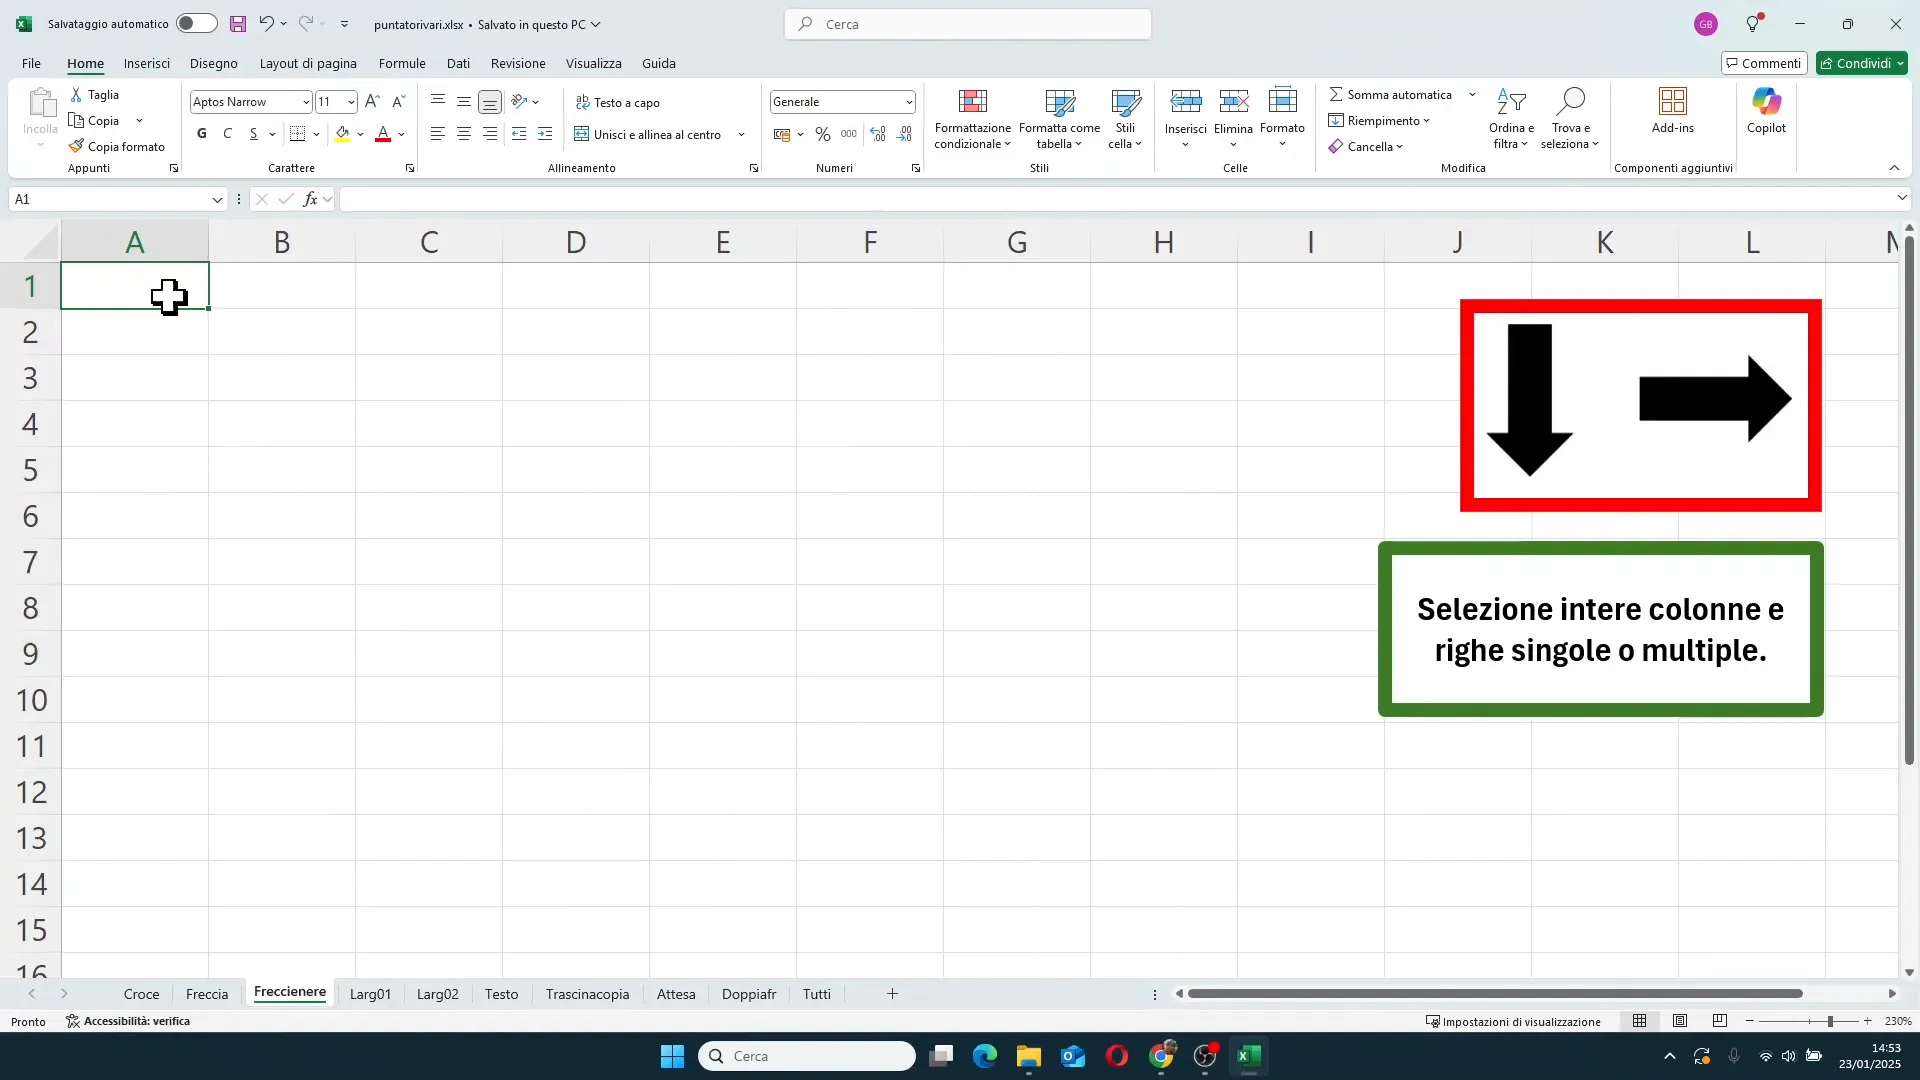
3. The two black arrows (vertical and horizontal)
When you hover the mouse over column headers (the letters at the top) or rows (the numbers on the left), the pointer changes into two black arrows:
- Black arrow pointing downwards: to select entire columns.
- Black arrow pointing to the right: to select entire rows.
A single click selects the corresponding column or row, while clicking and holding allows you to select multiple columns or rows at once by dragging the mouse.
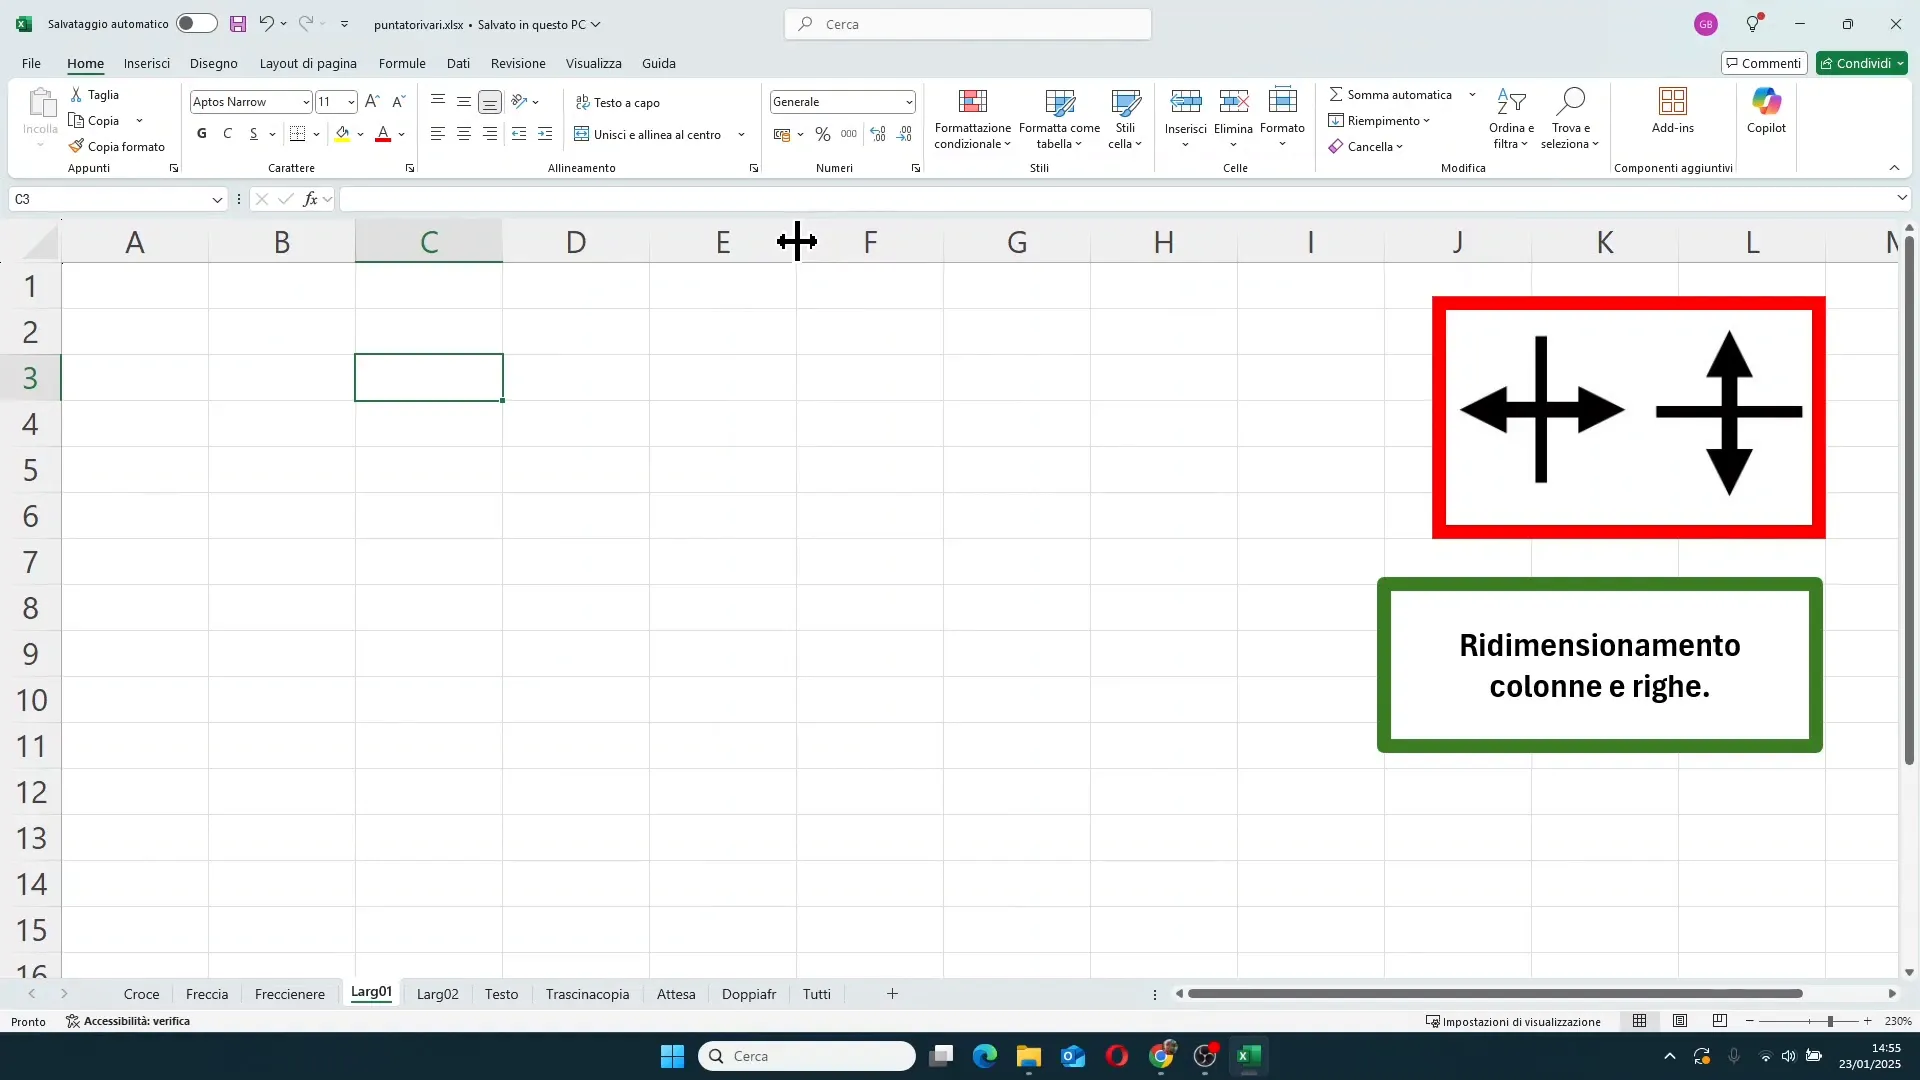
4. The pointer for resizing columns and rows (double-headed arrow with center line)
This pointer appears when you place the mouse between two columns or two rows. It has the shape of two opposing arrows with a vertical or horizontal line in the middle. It is used to modify column width or row height.
To use it, simply click and drag the mouse right or left (for columns) or up/down (for rows) to widen or narrow the size.
Excel also allows you to resize multiple columns or rows at the same time. Simply select multiple columns or rows with the white cross pointer, then position yourself on the border of any selected column or row with the resize pointer and drag. All selected columns or rows will resize uniformly.
Furthermore, if you select the entire sheet (by clicking on the top-left corner), you can resize all columns or rows together.
5. The pointer for resizing hidden columns and rows
When we hide a column or a row (for example, by narrowing it to zero size), the pointer changes slightly and shows a double vertical or horizontal line. This indicates that the column or row is hidden and allows us to restore its visibility by widening the size.
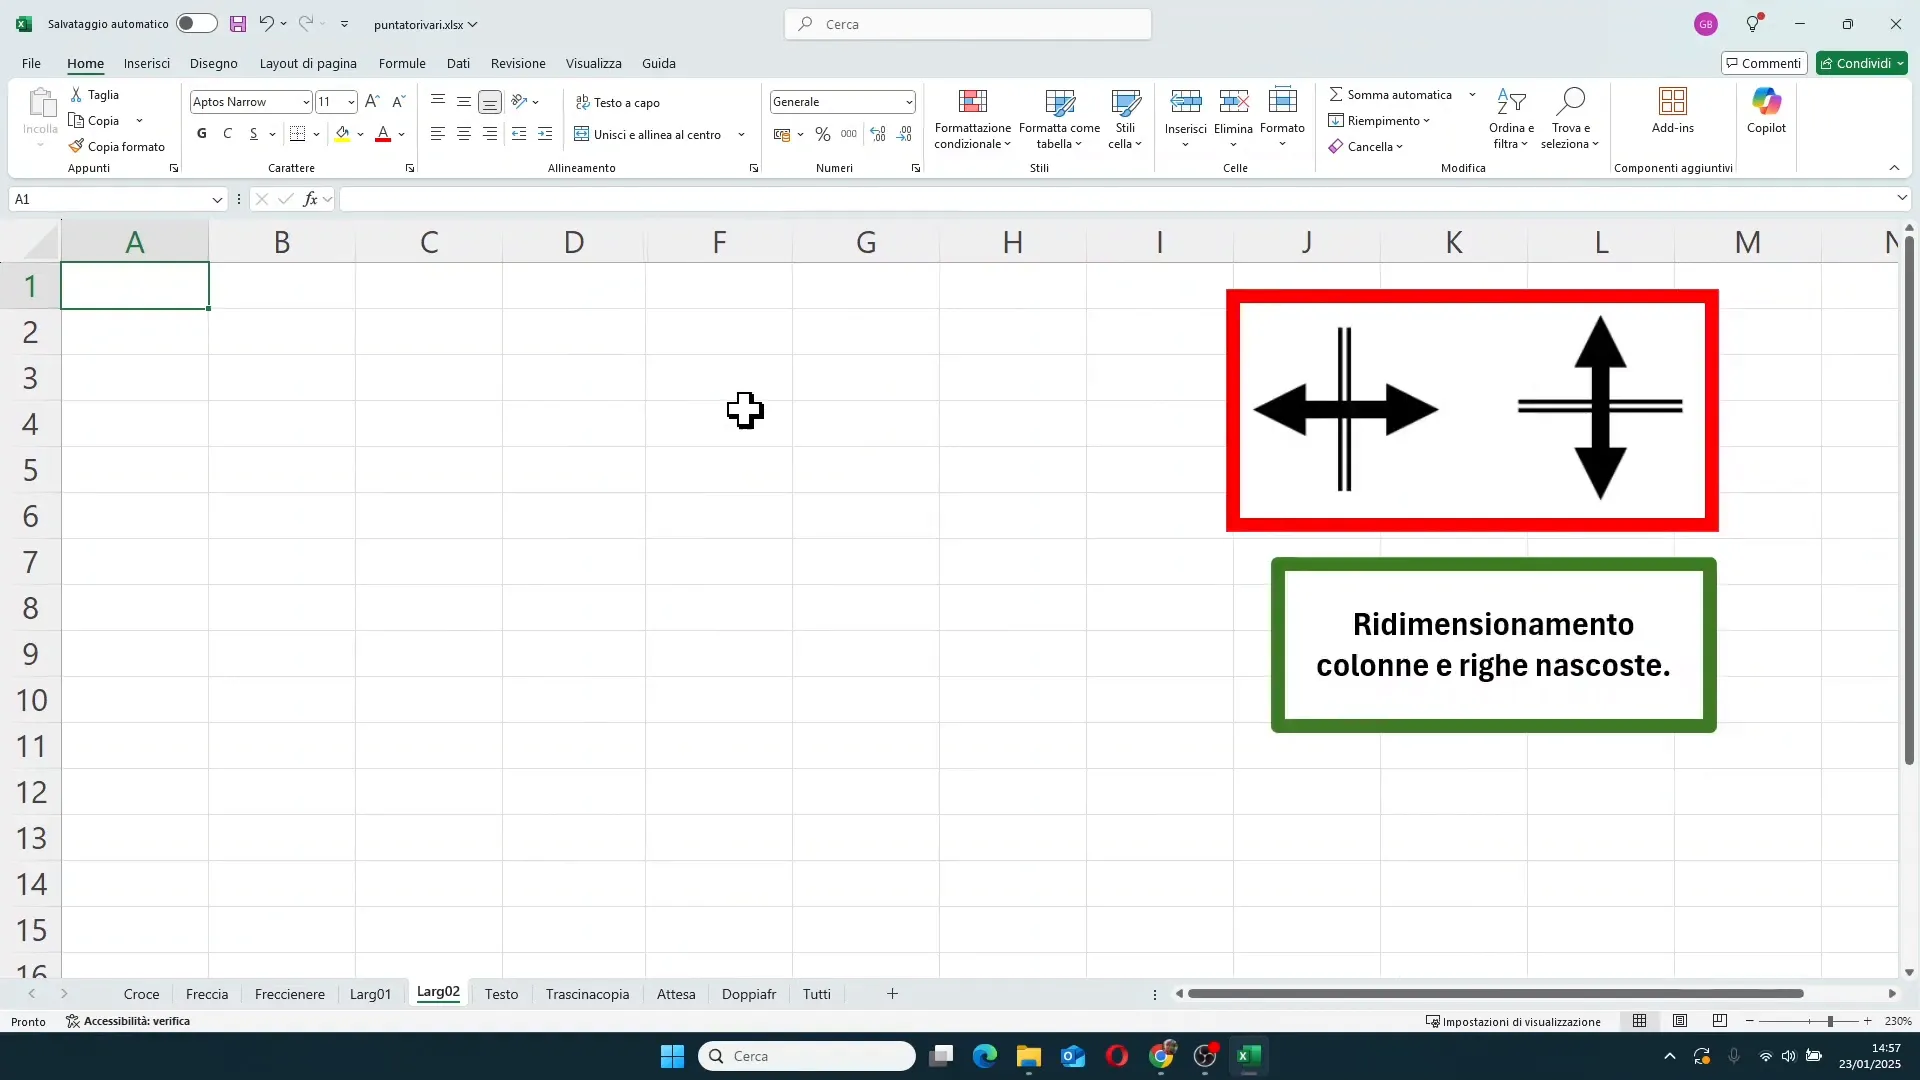
To restore the hidden column or row, simply position yourself in the space between the adjacent columns or rows and drag with this special pointer to widen the hidden column or row.
6. The text pointer (I-beam vertical bar)
When you position yourself in the name box (top left) or in the formula bar, the pointer changes to an I-beam vertical bar. This allows you to select and edit the text inside the box or formula.
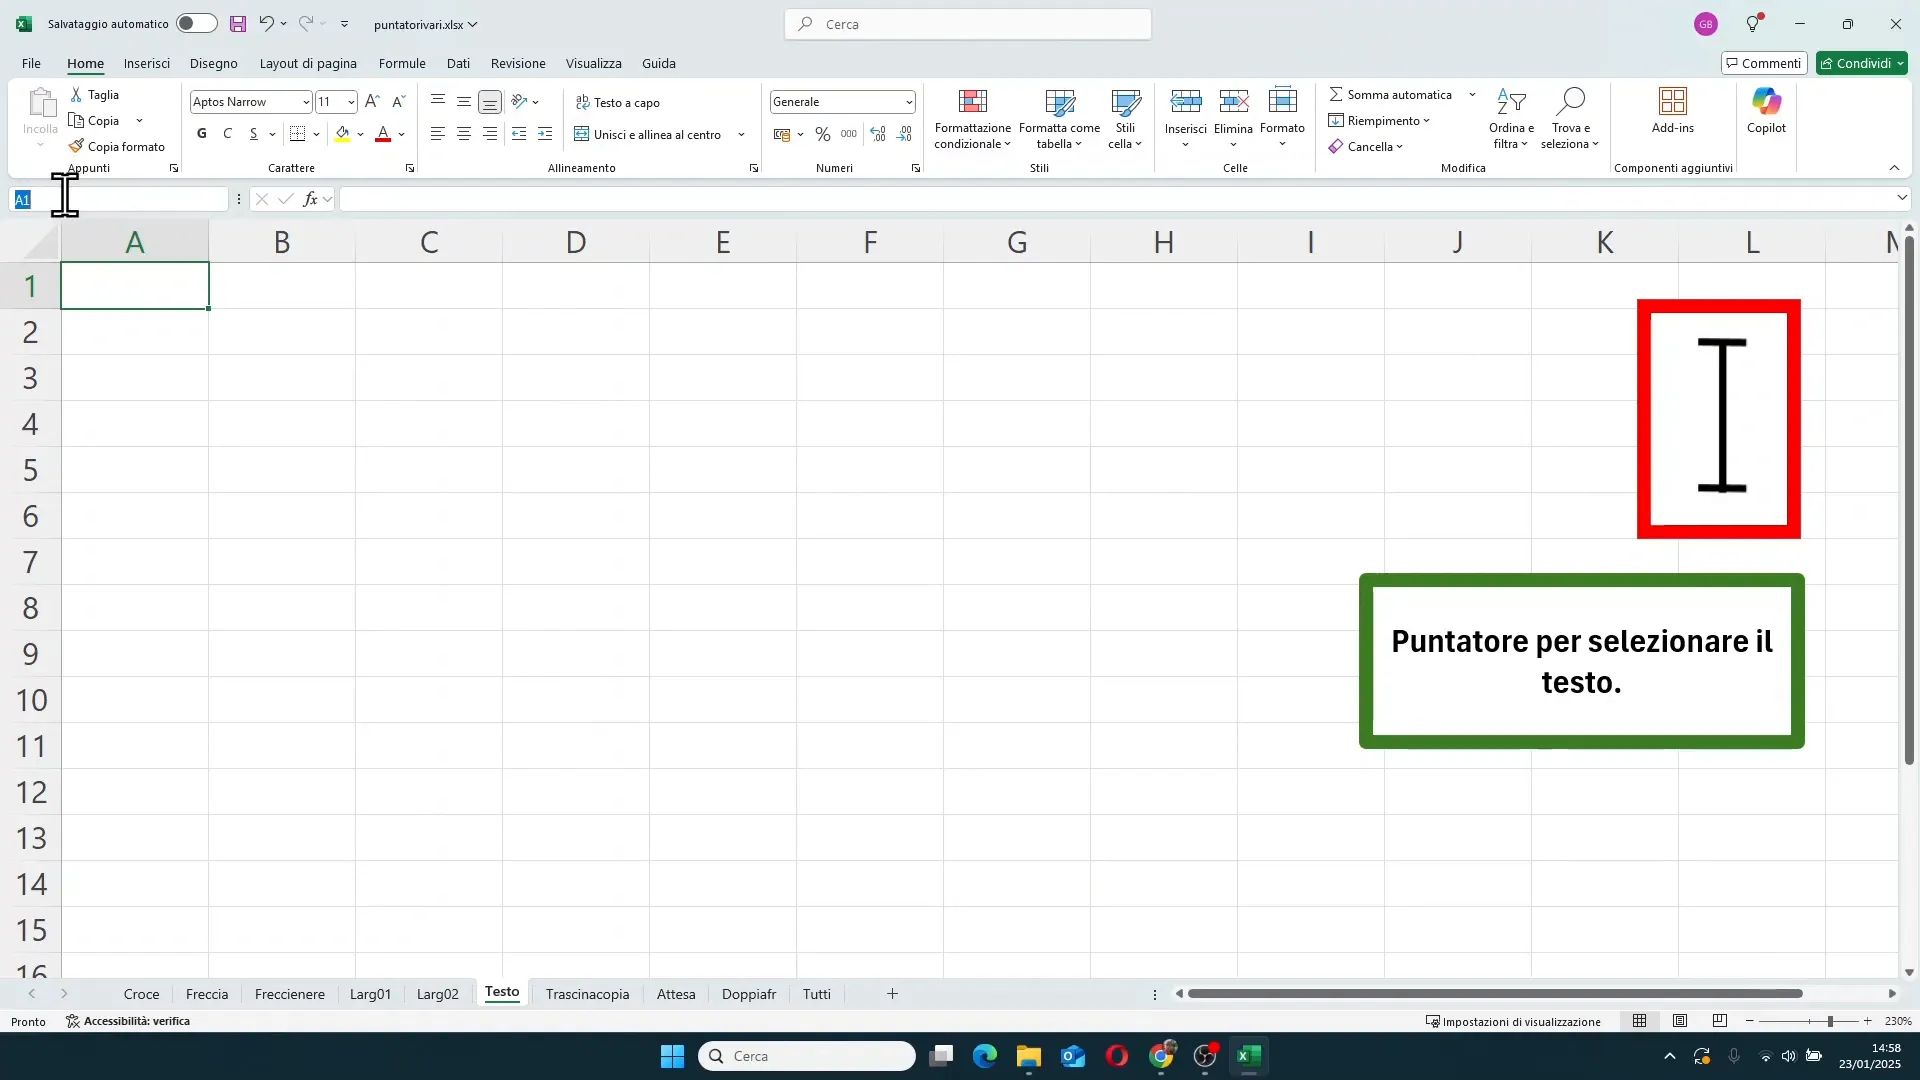
The same pointer also appears when you double-click on a cell to enter text editing mode or when you rename sheets by double-clicking on the sheet name.
7. The pointers for moving and copying cell content
When you select one or more cells, a border appears around the selection and a small square in the bottom-right corner.
On the border of the selection, the pointer becomes a four-headed arrow. This pointer is used to move cell content: click, hold, and drag the selection to another position to move the data.
On the small square in the bottom-right corner, the pointer becomes a small thin black cross. This pointer is used to copy cell content: by clicking and dragging down, right, left, or up, Excel will copy the content into adjacent cells.
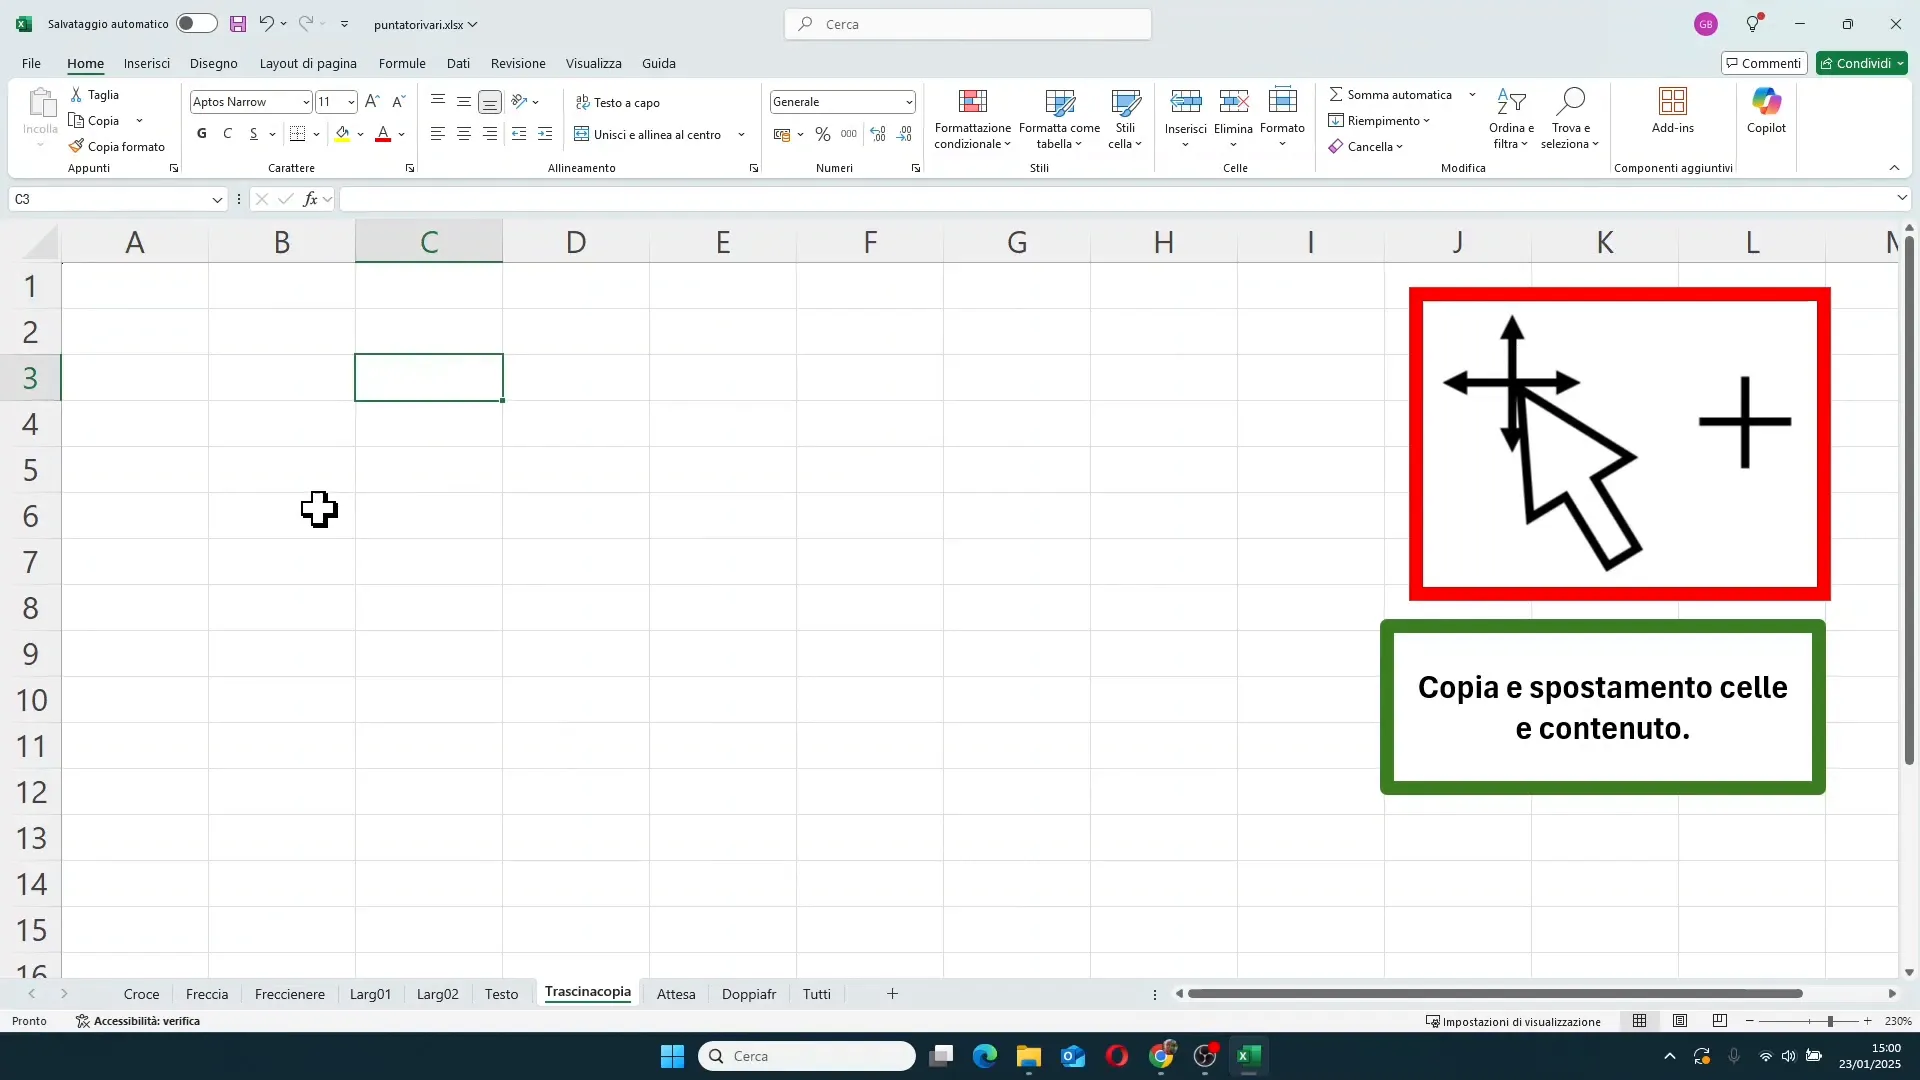
This function is very useful for replicating formulas, values, or formatting quickly and accurately.
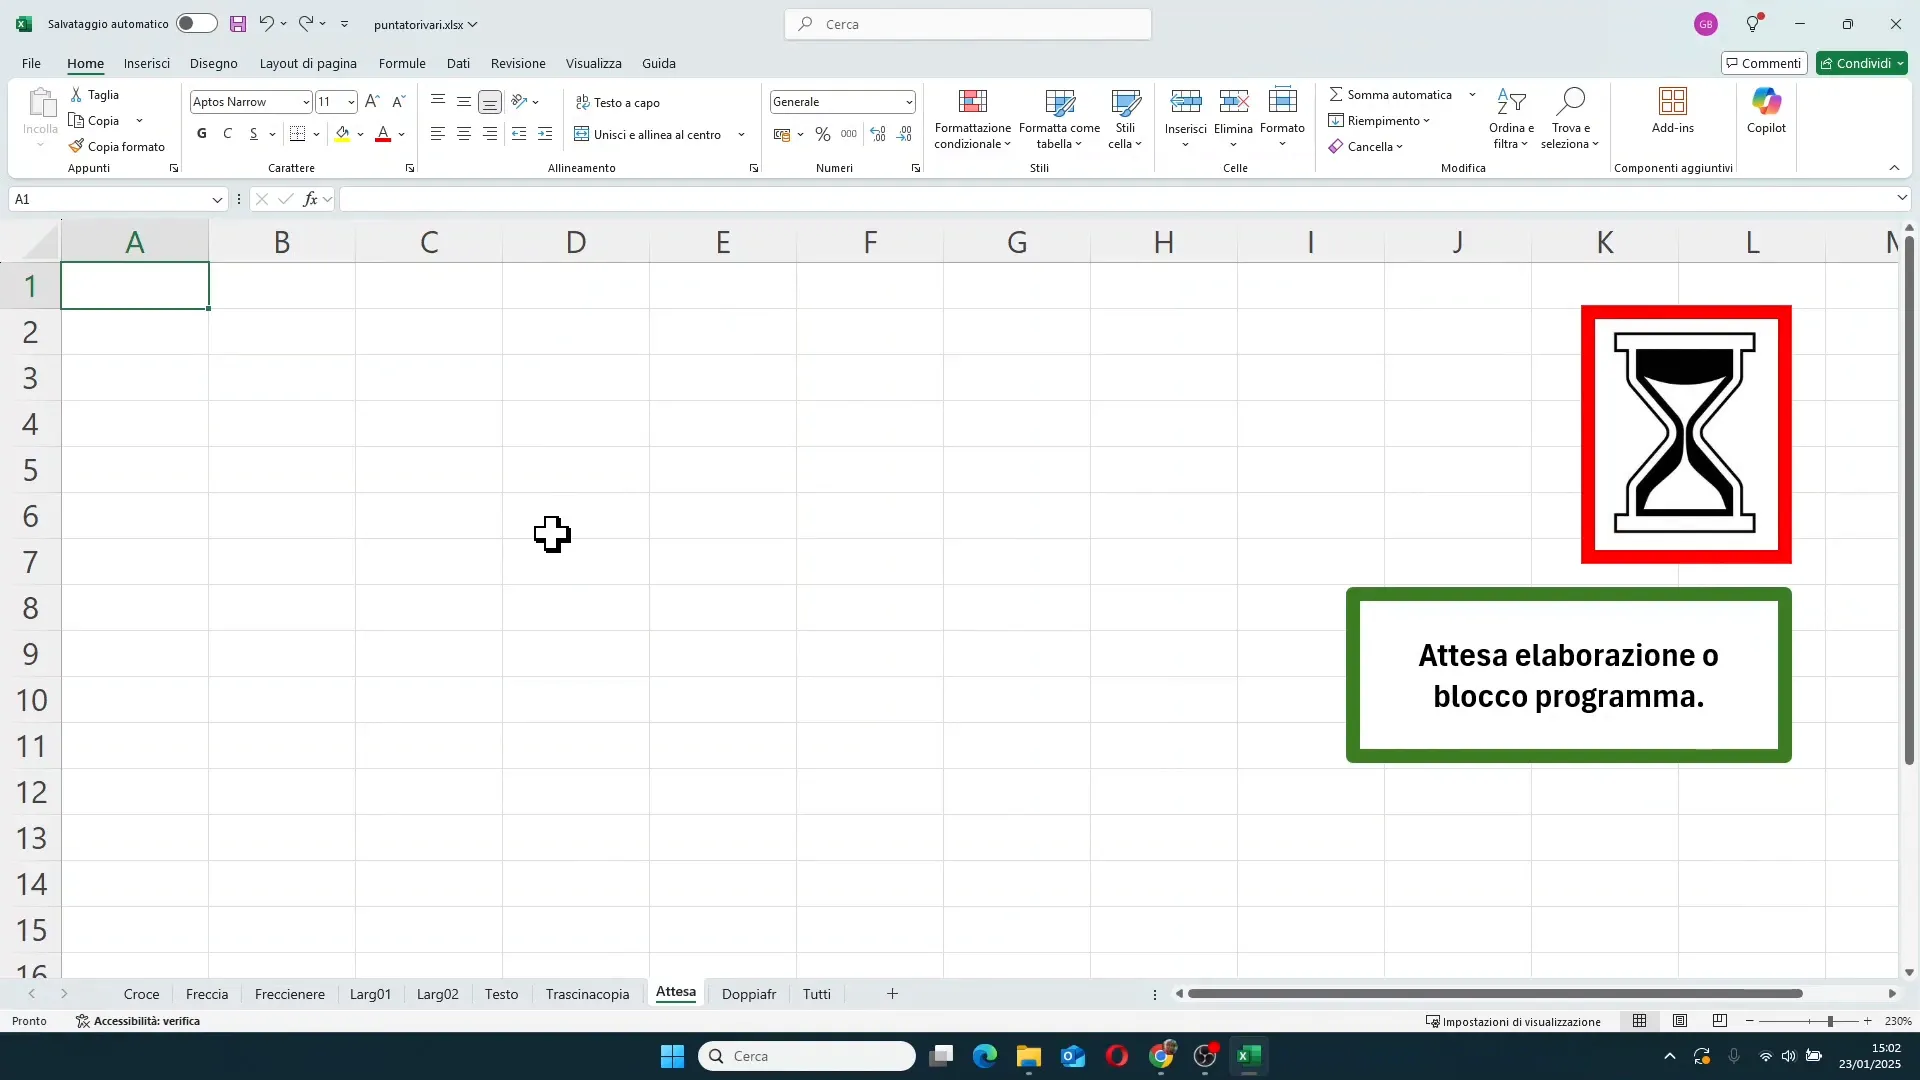
8. The waiting pointer (hourglass/busy)
The hourglass-shaped pointer appears when Excel is processing something or when the program is temporarily frozen. For example, it can appear during complex processing or a heavy calculation.
When you see the hourglass, it means you have to wait for the operation to end. If the program freezes completely, an error message or a restart request may appear.
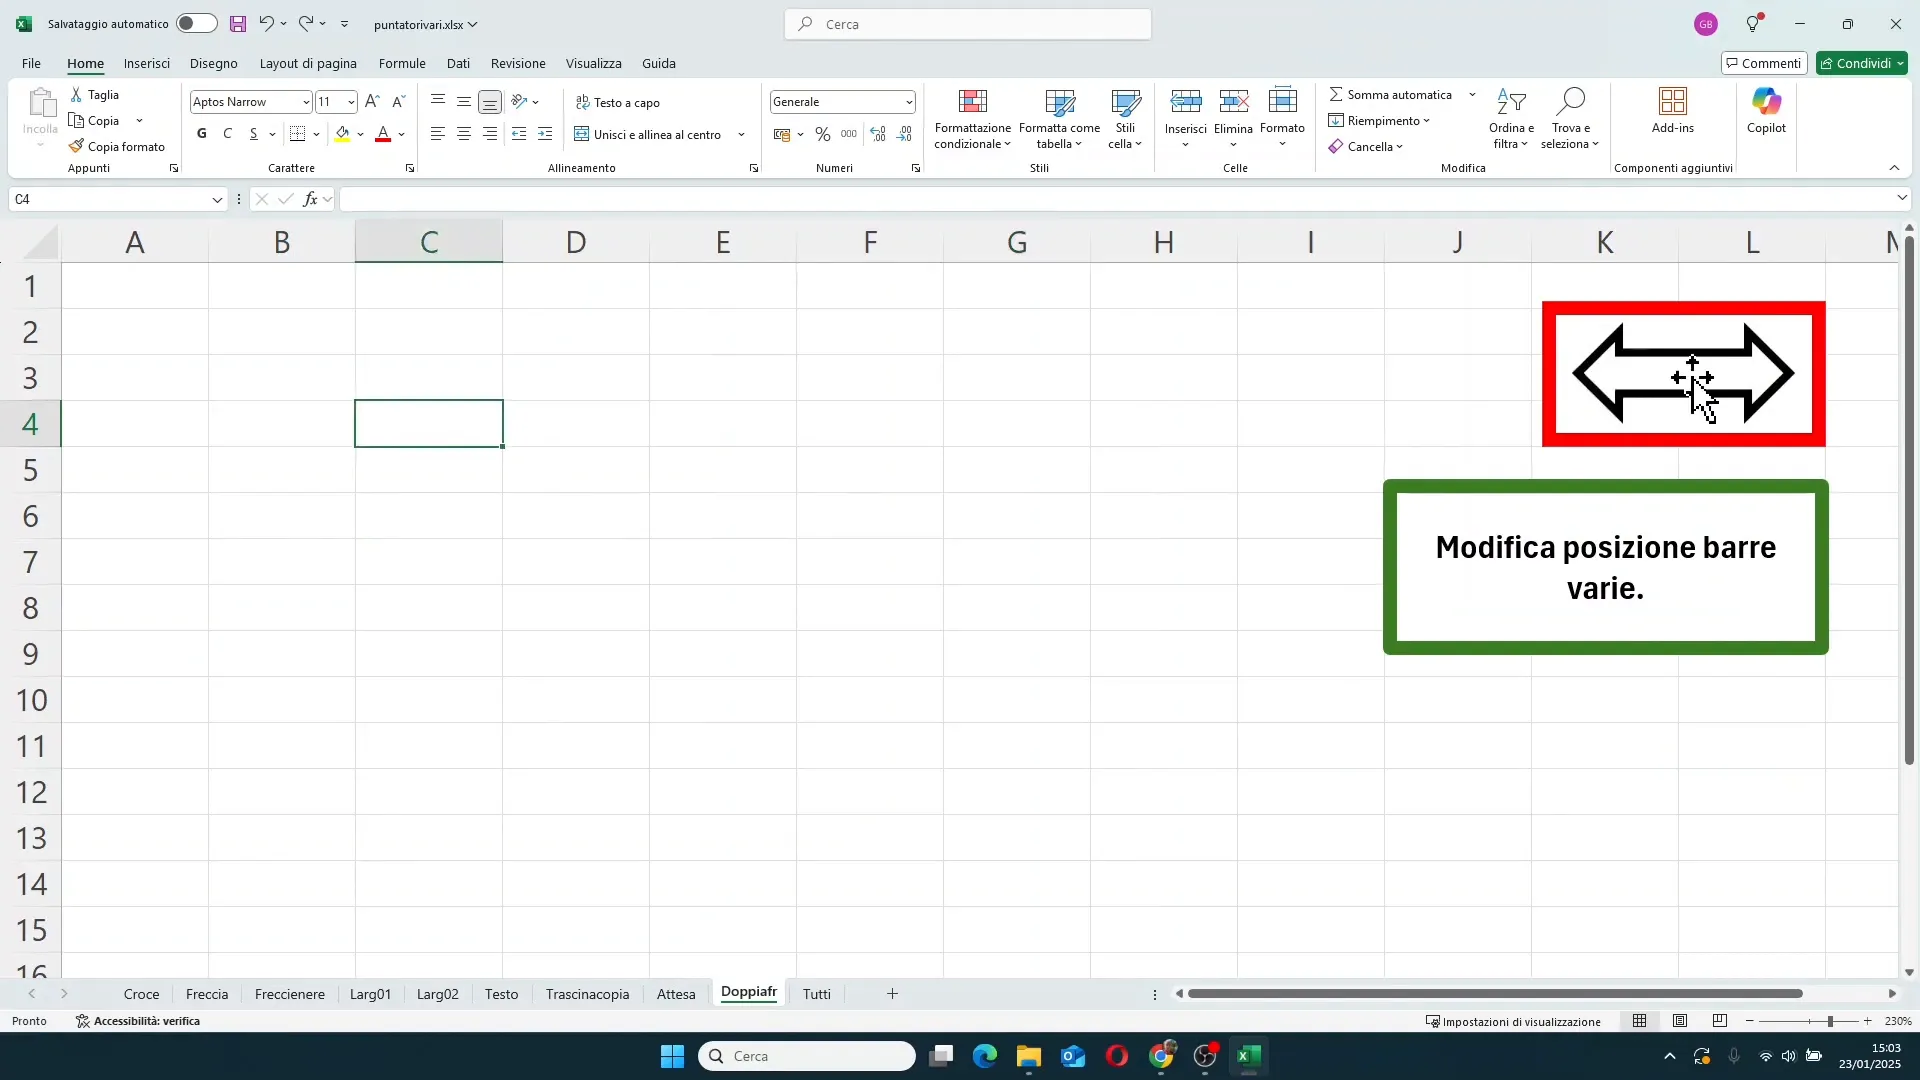
9. The double horizontal arrow for resizing bars
Finally, there is a double horizontal arrow pointer that appears when you position the mouse between the formula bar and the name box, or between the scroll bar and the sheet names at the bottom.
This pointer allows you to change the width of these bars, adapting them to your viewing needs.
How to make the most of Excel pointers
Now that you know the meaning of each pointer, it's important to understand how to use them to speed up your work:
- Quick selection: Use the white cross pointer to quickly select ranges of cells without errors.
- Column and row management: Resize columns and rows accurately using the double-arrow pointer. Remember that you can resize multiple columns or rows at once by selecting them first.
- Hidden rows and columns: Watch out for the special pointer indicating hidden columns or rows. It helps you restore them easily without having to search through menus.
- Edit text and formulas: The I-beam pointer helps you enter text or formula editing mode without having to double-click repeatedly or use the keyboard.
- Move and copy data: Leverage the move and copy pointers to replicate data or move content intuitively and quickly.
- Wait patiently: If you see the hourglass, know that Excel is working and that you must wait to avoid freezes or errors.
Frequently Asked Questions (FAQ)
Why does my mouse pointer change shape in Excel?
The pointer changes shape to indicate what type of action you can perform at that specific spot on the worksheet or interface. This helps you work with greater precision and speed.
How can I select multiple columns or rows at the same time?
Position the black arrow pointer over the first column or row, click and hold while dragging over adjacent columns or rows. This selects a multiple range.
How can I resize multiple columns or rows together?
Select multiple columns or rows with the white cross pointer, then position the resize pointer on one of the selected borders. Drag to change the size of all of them at once.
What does it mean when I see the pointer with two vertical or horizontal lines?
It indicates that there is a hidden column or row in that position. You can use it to restore visibility by resizing the hidden column or row.
How can I quickly copy the content of a cell to other cells?
Use the fill handle in the bottom-right corner of the selected cell (thin black cross pointer). Click and drag to copy the content into adjacent cells.
When does the hourglass pointer appear?
When Excel is processing data or is temporarily frozen. It indicates that you need to wait for the operation to complete.
Conclusion
Knowing the secret language of Excel pointers is a fundamental step to becoming a more experienced and productive user. Each pointer has a precise meaning and function that helps you navigate, select, edit, and manage your worksheets with ease and precision.
Remember that the pointer is a true ally: observe it carefully and let its shapes guide you to make the most of Excel's potential.
If you want to go even deeper into Excel and other tools, I invite you to discover the customized courses I offer for individuals and businesses, tailored to reach your professional goals.
Thank you for reading this article, and see you in the next Excel feature guide!